13 May 2023
Building and developing Android apps requires some initial setup.
Specifically, you need to ensure that you have the correct versions of Java, Gradle, and the Android SDK installed on your development machine.
In some cases, you may also need to install Node.js if you’re building a Cordova app for example.
Fortunately, dev containers can make the setup process much easier.
Dev containers are containerized environments for developing software.
They integrate well with VS Code.
By using a dev container, you can automate the installation of all the necessary tools and dependencies, saving you time and hassle.
In the next section, we’ll walk through the steps required to set up a dev container for Android app development.
To set up our dev container, we’ll start with the universal dev container image provided by Microsoft.
This image includes a wide range of useful tools and libraries for development, making it an ideal base for our needs.
From there, we’ll add some custom Dockerfile snippets that install the Android SDK and other necessary components.
These snippets and scripts have been sourced from the mindrunner/docker-android-sdk repository.
With these pieces in place, we’ll have a fully-functional Android development environment that we can use to build and test our apps.
Let’s clone this project:
git clone https://github.com/mindrunner/docker-android-sdk.git
And let’s add a new Dockerfile:
# Use the Microsoft dev container as the base image
FROM mcr.microsoft.com/vscode/devcontainers/universal

# Set environment variables used by the Android SDK
ENV ANDROID_SDK_HOME /opt/android-sdk-linux
ENV ANDROID_SDK_ROOT /opt/android-sdk-linux
ENV ANDROID_HOME /opt/android-sdk-linux
ENV ANDROID_SDK /opt/android-sdk-linux

# Set Debian to not prompt for user input during package installation
ENV DEBIAN_FRONTEND noninteractive

# Update package list and install packages required for Android app development
RUN apt-get update -yqq && \
    apt-get install -y \
      curl \
      expect \
      git \
      make \
      wget \
      unzip \
      vim \
      openssh-client \
      locales \
      libarchive-tools && \
    apt-get clean && rm -rf /var/lib/apt/lists/* && \
    localedef -i en_US -c -f UTF-8 -A /usr/share/locale/locale.alias en_US.UTF-8

# Set the system language to US English
ENV LANG en_US.UTF-8

# Create a new group and user with UID 1001
RUN groupadd android && \
    useradd -d /opt/android-sdk-linux -g android -u 1001 android

# Copy the tools and licenses directories to the /opt directory in the image
COPY tools /opt/tools
COPY licenses /opt/licenses

# Set the working directory to /opt/android-sdk-linux and run the entrypoint script
WORKDIR /opt/android-sdk-linux
RUN /opt/tools/entrypoint.sh built-in
Now to build it docker build -t android-sdk . from the root of the repository.
This results in the following devcontainer.json:
{
  "dockerFile": "Dockerfile"
}
A devcontainer.json contains the specification for the development environment.
In practice, you can configure more specific things for your project in this file.
For example you can choose specific software versions here or allow access to resources.
To switch Java or Gradle versions, check the documentation of SDKMAN and the features part of the dev container specification.
With this, we’re good to start developing Android apps using this environment.
You could use this either locally with VS Code or remotely using Github Codespaces.
It’s also great for helping new contributors to your software project get set up quicker.
To wrap up the project, the entire setup has been proposed here:
mindrunner/docker-android-sdk#49
22 Apr 2023
Browsers are strict about Cross Origin Resource Sharing (CORS), to protect users from leaking credentials to different untrusted domains.
This can be a hurdle if you try to use Pyodide (Python in the browser).
Previously, I shimmed Python requests to be usable from Pyodide, but I will not use this shim here.
It has now been deprecated by a better way to patch this into the requests and aiohttp libraries.
To illustrate the CORS problem in isolation, I’m simply going to use Javascript’s fetch in this post.
First, I made a few modifications to the httpbin project, so we can simulate responses with various CORS headers.
If we try to get a file from a host that has a CORS policy with Access-Control-Allow-Origin set to http://example.com
fetch('https://httpbin.example.com/response-headers?Access-Control-Allow-Origin=http://example.com')
we might get the following error:
Cross-Origin Request Blocked: The Same Origin Policy disallows reading the remote resource at https://httpbin.example.com/response-headers?Access-Control-Allow-Origin=http://example.com. (Reason: CORS header ‘Access-Control-Allow-Origin’ does not match ‘http://example.com’).
And/Or this one if a Content Security Policy is in place:
Content Security Policy: The page’s settings observed the loading of a resource at https://httpbin.example.com/response-headers (“default-src”). A CSP report is being sent.
Or the following error if the header is missing completely:
Access to fetch at 'https://httpbin.example.com/no-cors-headers' from origin 'https://notebook.example.com' has been blocked by CORS policy:
No ‘Access-Control-Allow-Origin’ header is present on the requested resource. If an opaque response serves your needs, set the request’s mode to ‘no-cors’ to fetch the resource with CORS disabled.
So there’s a lot of stars that have to align for our request to work.
This request would be trivial if we made it with an HTTP client that is not a browser.
CORS policies are only enforced by browsers, as mentioned in MDN’s documentation on CORS:
The Cross-Origin Resource Sharing standard works by adding new HTTP headers that let servers describe which origins are permitted to read that information from a web browser.
So it’s the server that determines which hosts can see which contents.
Having the server change their headers is not feasible in most cases, so let’s introduce CORS proxies.
A CORS proxy is a server in the middle that simply strips or replaces some of the headers that are causing trouble.
A minimal example to set this up, using the cors-anywhere project:
/* corsserver.js */
var cors_proxy = require('cors-anywhere');
cors_proxy.createServer({
    originWhitelist: [],
    requireHeader: [],
    removeHeaders: []
}).listen(8080, '0.0.0.0', function() {
    console.log('Running CORS Anywhere');
});
Start it with:
npm install cors-anywhere  # install the dependency to your project
node corsserver.js  # run the server
Typical HTTP proxies work with the CONNECT method.
This one doesn’t, it works by suffixing the URL you want to fetch behind the URL of the CORS proxy.
There’s a good reason this suffixing is used.
Browsers don’t expose the HTTP CONNECT method typically used for proxies.
Using our proxy our modified request will look something like this:
fetch('https://corsproxy.example.com/https://httpbin.example.com/response-headers?Access-Control-Allow-Origin=http://example.com')
Note that our response now is available, and no errors appear in the browser’s Console.
The Access-Control-* headers have been stripped.
With some work this can be added to the requests shim as well.
If you would actually put this into production, there’s some things you might want to do:
- If your server requires authentication, make sure the CORS proxy also requires this.
“Open proxies” on the internet will attract a lot of malicious traffic.
- Put the notebook and the proxy behind the same reverse proxy, so they share a domain.
This makes setting up the authentication a lot easier as well.
- If you set up authentication, make sure the CORS proxy checks for authentication, but also make sure it doesn’t forward the
Cookie header (see removeHeaders parameter).
- Set up monitoring on the proxy.
- Consider whether having whitelists on the CORS proxy is compatible with your use case.
This removes some risks.
TLDR: If you are deploying an application that uses Pyodide (a project like Starboard, Quadratic or Jupyter Lite), it might make sense to also deploy a CORS proxy.
15 Apr 2023
Plotting data is an essential part of data analysis, and there are many libraries available for this task.
Plotly is a popular library for creating interactive plots in Python.
However, it turned out not to be trivial to use this in Starboard Notebook.
In this blog post, I’ll describe how I fixed this.
Plotly is not shipped with Pyodide’s default distribution.
It needs to be installed with micropip.
The code below tries to create a small scatterplot.
(Note that all code in this post is intended to be run using Pyodide, not in the typical Python interpreter)
# to populate the entry in Pyodide's sys.modules and keep plotly happy
import pandas

import micropip
await micropip.install('plotly')

import plotly.express as px

x = [1, 2, 3]
y = [1, 2, 3]
fig = px.scatter(x=x, y=y)
fig  # results in: AttributeError: module 'webbrowser' has no attribute 'get'
This is not enough to render the plot, unfortunately.
Plotly tries to open a webbrowser.
Understandably, it doesn’t realize Python already is running in a webbrowser.
A convention within notebooks is that HTML content is available from an object’s _repr_html_ method.
This is the HTML equivalent to Python’s standard __repr__ method, which contains a (hopefully nice) string representation of an object.
Although plotly does implement this convention since this pull request,
it seems to try to use a renderer first, which in turn tries to open a webbrowser.
To fix this in your own notebook, there’s two options.
- Patch the
_repr_html_ method on the figure in a hacky way:
from functools import partial

fig._repr_html_ = partial(fig.to_html, include_plotlyjs=True, full_html=False)
fig
- Create an HTML element and fill it with the output of the
to_html method:
 from js import document

 html = fig.to_html(
     include_plotlyjs=True,  # include the Javascript library code
     full_html=False,  # don't build a full HTML document
 )

 div = document.createElement('div')
 div.innerHTML = html
 div
Either of these two fixes will eliminate the error, but there’s one problem left:
Dumping a script tag on the DOM will not get it evaluated automatically.
This stackoverflow post,
the MDN documentation
and the standards itself confirm this.
This is a bit silly, because Javascript added in different places (like onerror) might still execute, as mentioned in the MDN documentation.
div = document.createElement('div')
div.innerHTML = "<img src='picturethat404s.gif' onerror='alert(1)'>"
div
So as a security measure it’s far from bulletproof, but it does take away the functionality of adding script tags to the DOM this way.
Using innerHTML with user input is still (very much) not recommended, but using it with safe input that contains script tags will not achieve the desired result.
There’s still a lot of risk, but some of the reward is no longer there.
Of course, we could find all the newly created script tags and eval it from a Javascript notebook cell.
To do that, we select all script tags that are enclosed in a cell output div (recognized by class name cell-bottom).
Let’s add this Javascript cell:
document.querySelectorAll('div.cell-bottom * script[type|="text/javascript"]').forEach(
    function(e) { eval(e.textContent); }
)
This will get the plots rendered!
As a solution I’m still not happy with it though.
In most cases, this code is not part of the story you want to tell in a notebook.
A notebook should not contain these kinds of distracting hacks to get the plots to render.
So, after talking about it on the Starboard Notebook Discord and on Github, we agreed on this solution: gzuidhof/starboard-notebook#138
Immediately after adding HTML output to the DOM, a script will loop over all script tags that are Javascript and evaluate them.
Now it will no longer be necessary to add the Javascript cell.
Special cases aren’t special enough to break the rules. - Zen of Python
What’s nice about this fix is that we don’t have to implement special code for every possible plotting library under the sun.
This is actually something that is getting out of hand I think.
Plotting libraries have large collections of special renderers for different notebooks (Kaggle Notebooks, Azure Notebooks etc.).
Vice versa, notebook software has all kinds of special extensions to support the many plotting libraries.
This fix is a small step to prevent more of that:
Anything that has a _repr_html_ with some scripts in them will now be evaluated.
Fair warning: Both eval and .innerHTML should not be used with untrusted (user) input.
The reason I think it can be used here, is because a user will always be the one providing their own code.
It gets a bit scarier when notebooks come from untrusted places.
It will also be a bigger risk when other security measures, like CORS, are not configured properly on the server.
If you’re interested in the open source contributions that will follow this post, here’s some links:
21 Feb 2023
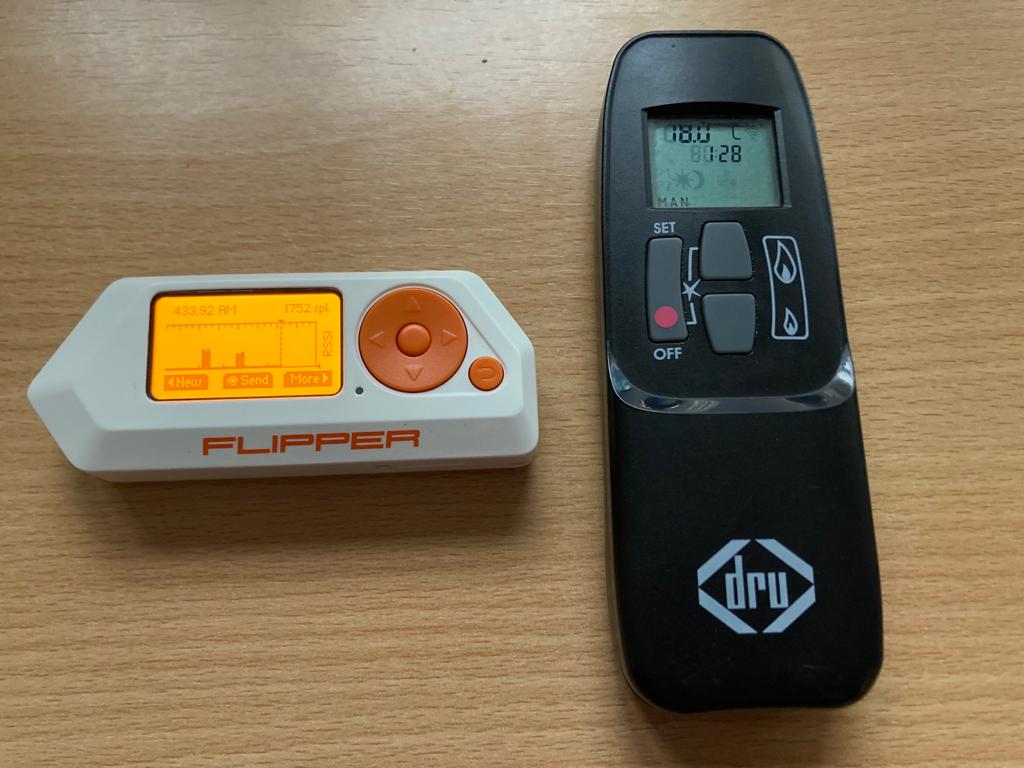
In the manual of my gas fireplace’s remote I came across this bit of text:
Voordat het toestel in gebruik wordt genomen, moet een communicatiecode
ingesteld worden tussen de afstandsbediening en de ontvanger. De code
wordt willekeurig gekozen uit de 65000 codes die beschikbaar zijn. Hierdoor
is de kans klein dat andere afstandsbedieningen in uw omgeving dezelfde
code gebruiken en de werking van uw toestel beïnvloeden.
Translated into English, it says something like:
Before using the device, a communication code needs to be set between the remote and the receiver.
This code is chosen randomly from the 65000 codes that are available.
Because of this, the chances are slim that a different remote in your environment uses the same code, which would interfere with the working of your device.
The number 65000 is suspiciously close to 2^16 (65536). This means that the Mertik GV60 (the remote type) might send a “unique-enough” 2-byte identifier over the air, along with the command for the heater.
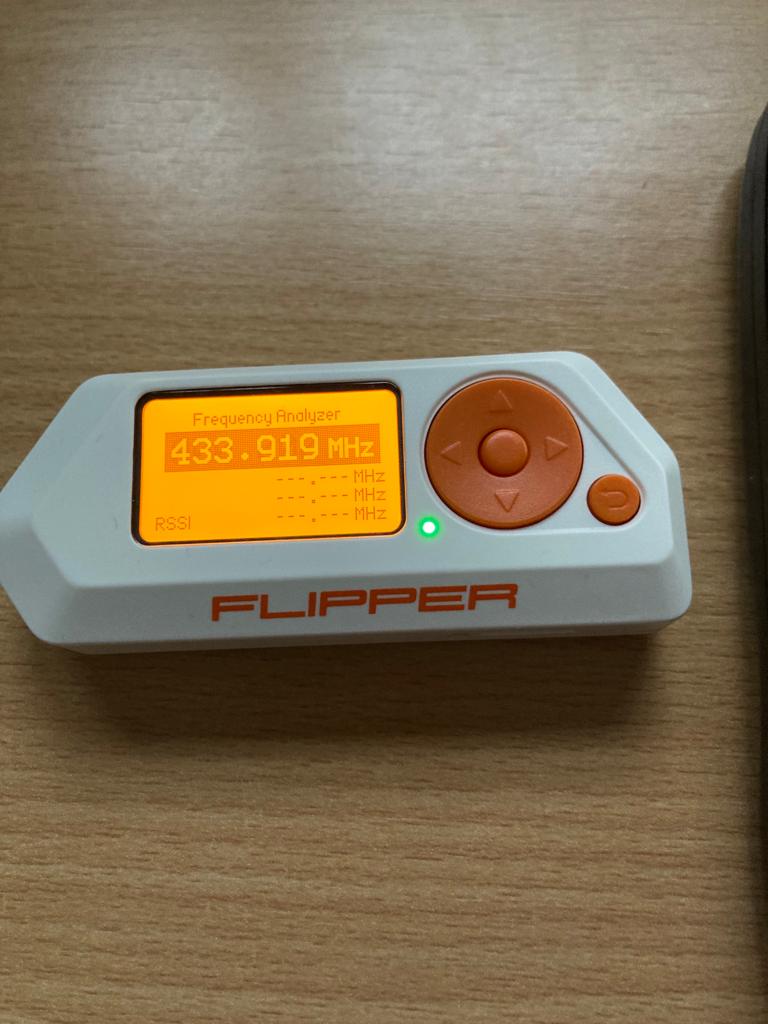
Since this remote transmits at 433.92 MHz, it can be interesting to see what the Flipper Zero makes of this signal.
To do this, I used the “Read Raw” functionality in the Sub-GHz app on the Flipper.
Dumping files for two different remotes, and for four different operations (higher, lower, ignite, turn off), we end up with eight files:
Remote0_higher.subRemote0_lower.subRemote0_ignite.subRemote0_off.subRemote1_higher.subRemote1_lower.subRemote1_ignite.subRemote1_off.sub
Since only one of these remotes works with my fireplace, it’s safe to assume they have different identifiers.
This will be nice later, if we are going to compare the signals.
Reading a bit more in the manual, it also seemed unlikely to me that there was an actual bi-directional handshake when connecting a remote to the fireplace.
To pair it, you need to put the receiver in pairing mode, and press the flame higher or lower button within 20 seconds.
This makes me suspect that the 2-byte identifier is hardcoded in the remote, since the remote itself does not have to be put in some kind of pairing mode.
Now we need to make sense of the Flipper Zero’s .sub-files. The documentation mentions that a raw .sub file contains timings, but does not have a lot of information beyond that:
RAW_Data, contains an array of timings, specified in micro seconds. Values must be non-zero, start with a positive number, and interleaved (change sign with each value).
Of course I am not the first person to look at those files, so I found the fzsubtk script on Github.
In absence of a software license, I just read this as inspiration to make my own visualisation.
While parsing the .sub-file, I discovered something that probably shouldn’t happen when dumping these files.
I had a Raw_Data line that started with a negative value, which should not be possible.
Of course I have submitted this as a Github issue: flipperzero-firmware#2260. I quickly received a reply, and it should be fixed for newer versions of the Flipper Zero firmware.
import numpy


def read_sub_ghz_file(filename):
    """
    Read a .sub file as produced by Flipper Zero, and prepare it for plotting.

    This method contains some fixes that might truncate some of the data.
    These should be fixed with a newer release of the Flipper Zero firmware.
    """
    with open(filename, 'r') as f:
        values, durations = [], []
        for line in f.readlines():
            if line.startswith("RAW_Data:"):
                data = [int(x) for x in line[10:].split(' ')]
                # The two fixes below are for Github issue flipperzero-firmware#2260
                if data[0] > 0 and data[1] > 0:
                    data = data[2:]
                if data[0] < 0:
                    data = data[1:]
                for i, point in enumerate(data):
                    if i % 2 == 0:
                        values.append(point)
                    else:
                        durations.append(point)
    durations, values = numpy.abs(numpy.array(durations)), numpy.cumsum(numpy.abs(numpy.array(values)))
    max_len = min([len(durations), len(values)])
    return values[:max_len], durations[:max_len]
from matplotlib import pyplot

remote1_lower = read_sub_ghz_file('Remote1_lower.sub')
remote0_lower = read_sub_ghz_file('Remote0_lower.sub')

# all the numbers below don't mean anything, and are just to align the plot a bit
pyplot.figure(figsize=(16, 8))
pyplot.ylim(-500, 2000)
pyplot.xlim(-2500, 15000)
pyplot.step(remote0_lower[0] - 941300,
            remote0_lower[1], where='pre')
pyplot.step(remote1_lower[0] - 761825,
            remote1_lower[1] - 400, where='pre')
pyplot.show()
 Now that we have plotted the signals produced by two different remotes nicely, it is time to start speculating on the encoding. My best guess currently is that we’re looking for a 3-byte sequence: two bytes to identify the remote, and one byte that specifies the command to execute.
These are the raw bits I think I can read from the plot:
Now that we have plotted the signals produced by two different remotes nicely, it is time to start speculating on the encoding. My best guess currently is that we’re looking for a 3-byte sequence: two bytes to identify the remote, and one byte that specifies the command to execute.
These are the raw bits I think I can read from the plot:
signal_blue =   '1100001001000000110011000'
signal_orange = '1000000100001000010011111'

len(signal_blue) // 8
There are many different ways to encode a digital signal over analog radio.
This video by Jacob Schrum explains some common ones quite well, and has helpful examples.
I might return to this project later, in an attempt to find the encoding.
I’ll be familiarizing myself with some signal processing tools, or perhaps try to bruteforce all possible encodings with some custom scripting.
Replaying the signal is nice, but the end goal of course is to create a Flipper application that can ignite any DRU fireplace.
Sources used:
- https://github.com/cberetta/flipperzero_scripts/blob/master/docs/fzsubtk_example.md
- https://www.bouwmansvuurtotaal.nl/wp-content/uploads/2016/04/Bouwmans_Vuur_Totaal_handleiding_compleet_Dru-Metrik-GV60.pdf
- https://www.kachelsenhaardenwinkel.nl/winkel/onderdelen/merk/dru/afstandsbediening-mertik-g6r-h4t28-xd/
- https://docs.flipperzero.one/sub-ghz/frequencies
- https://www.youtube.com/watch?v=i_TLLACZuRk&ab_channel=JacobSchrum
- https://github.com/flipperdevices/flipperzero-firmware/blob/27ee0f73f7b81e6791c07f036939015dec9f6a85/documentation/file_formats/SubGhzFileFormats.md
- https://github.com/flipperdevices/flipperzero-firmware/issues/2260
31 Jul 2022
This is a follow-up on the previous post on how to get Pip working with Pythonista.
We ended with a working pip but didn’t have a way of installing binary packages yet (like scipy and scikit-learn).
Using the Oracle Cloud, which offers (free!) aarch64 intances, I tried to build some Python wheels for my iPhone.
sudo apt install zlib1g-dev make libssl-dev curl
git clone https://github.com/deadsnakes/python3.6
cd python3.6
./configure
make
curl -L https://bootstrap.pypa.io/pip/3.6/get-pip.py > ./get-pip.py
./python get-pip.py
./python -m pip wheel scikit-learn
After uploading it to my PyPI repository we can try to install it using pip.

Except unfortunately, this wheel is still not in the expected format.
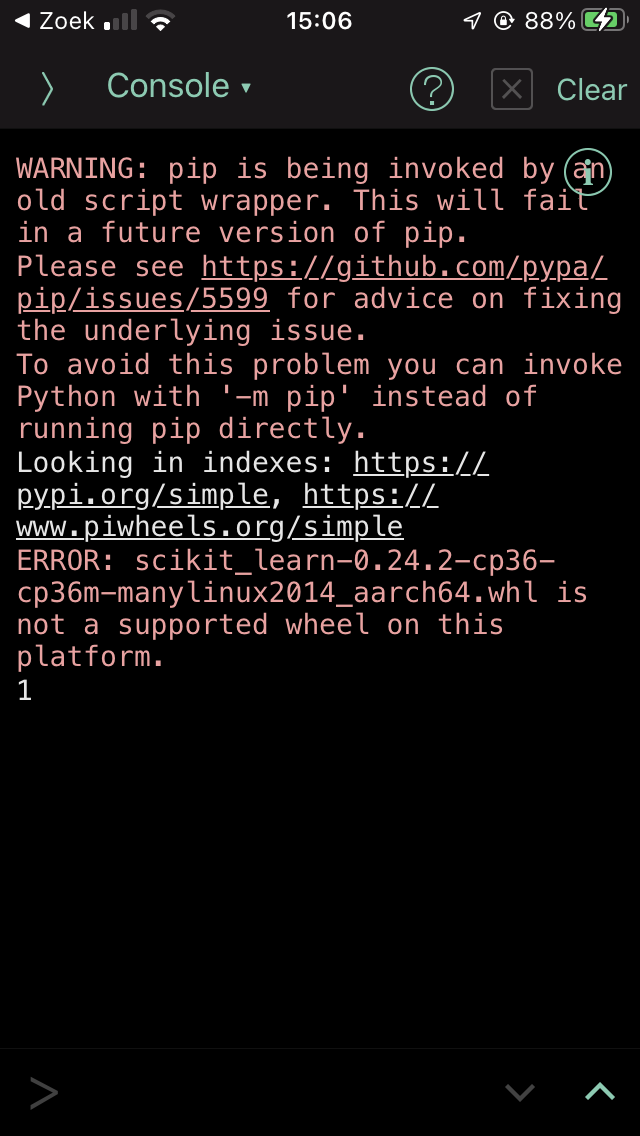
This is related to how the wheel file format is specified in PEP 0427.
The short summary is that the platform tag can be seen in the filename:
{distribution}-{version}(-{build tag})?-{python tag}-{abi tag}-{platform tag}.whl.
To find out what platform tags Pythonista asks for on iPhones, I added a debug line in pip/_internal/index/package_finder.py, and ran pip again.
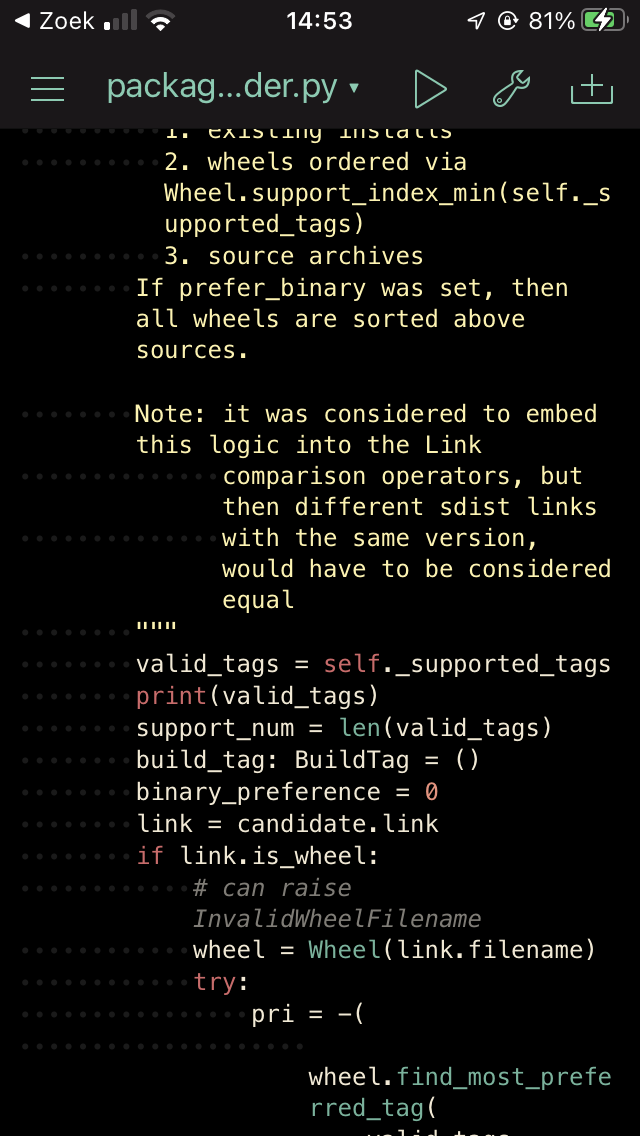
This resulted in the following list of platform tags:
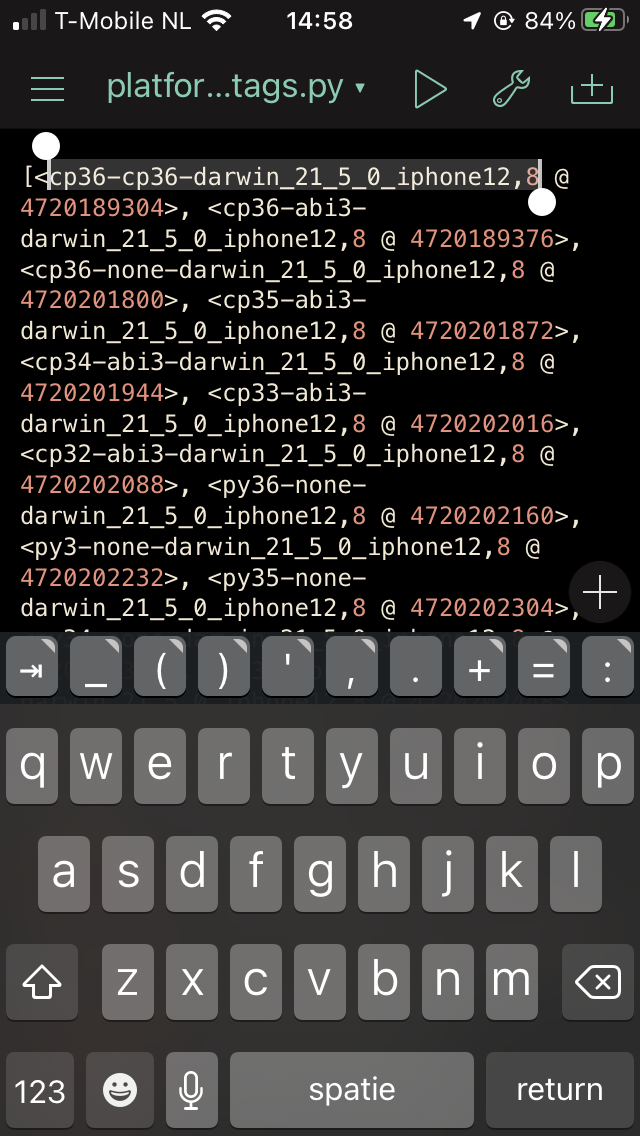
The Python wheels will need to comply to this expected platform tag.
Instead of cp36-cp36m-manylinux2014_aarch64 it looks like it needs to say cp36-cp36-darwin_21_5_0_iphone12,8.
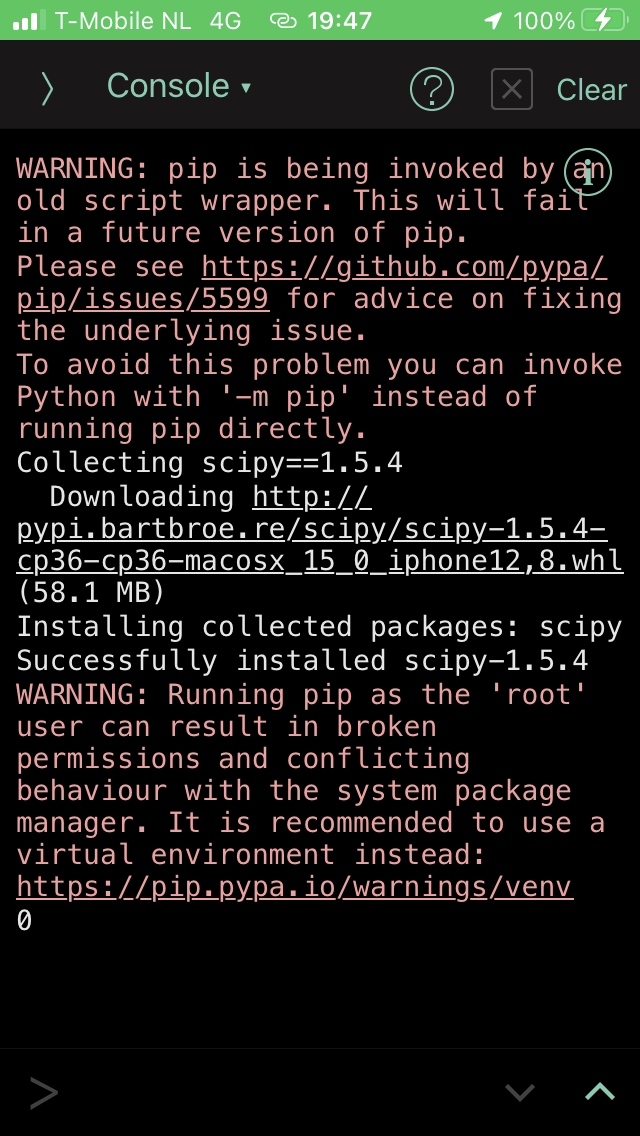
Update: Right after finishing this post I noticed that the platform tag changed to cp36-cp36-macosx_15_0_iphone12,8 (instead of the darwin tag above).
This might have been caused by an iOS update.
After running auditwheel fix on the created wheel all relevant system libraries are copied into the wheel.
Now I run the following script to modify the wheel to use the expected platform tag:
import zipfile


with zipfile.ZipFile('scipy-1.5.4-cp36-cp36m-linux_aarch64.whl', 'r') as input_wheel:
    with zipfile.ZipFile('scipy-1.5.4-cp36-cp36-macosx_15_0_iphone12,8.whl', 'w',
                         compression=zipfile.ZIP_DEFLATED) as output_wheel:
        for input_zipinfo in input_wheel.infolist():
            if input_zipinfo.filename.endswith('.dist-info/WHEEL'):
                output_wheel.writestr(
                    input_zipinfo.filename,
                    input_wheel.read(input_zipinfo.filename).replace(
                        b'cp36-cp36m-linux_aarch64',
                        b'cp36-cp36-macosx_15_0_iphone12,8')
                )
            elif input_zipinfo.filename.endswith('.dist-info/RECORD'):
                output_wheel.writestr(
                    input_zipinfo.filename,
                    input_wheel.read(input_zipinfo.filename).replace(
                        b'.cpython-36m-aarch64-linux-gnu',
                        b'')
                )
            else:
                output_wheel.writestr(
                    input_zipinfo.filename.replace('.cpython-36m-aarch64-linux-gnu', ''),
                    input_wheel.read(input_zipinfo.filename)
                )
Now it is recognized by pip as suitable for the platform and installs without issue.
When trying to use the newly installed scipy however, it still can’t find the correct shared objects.

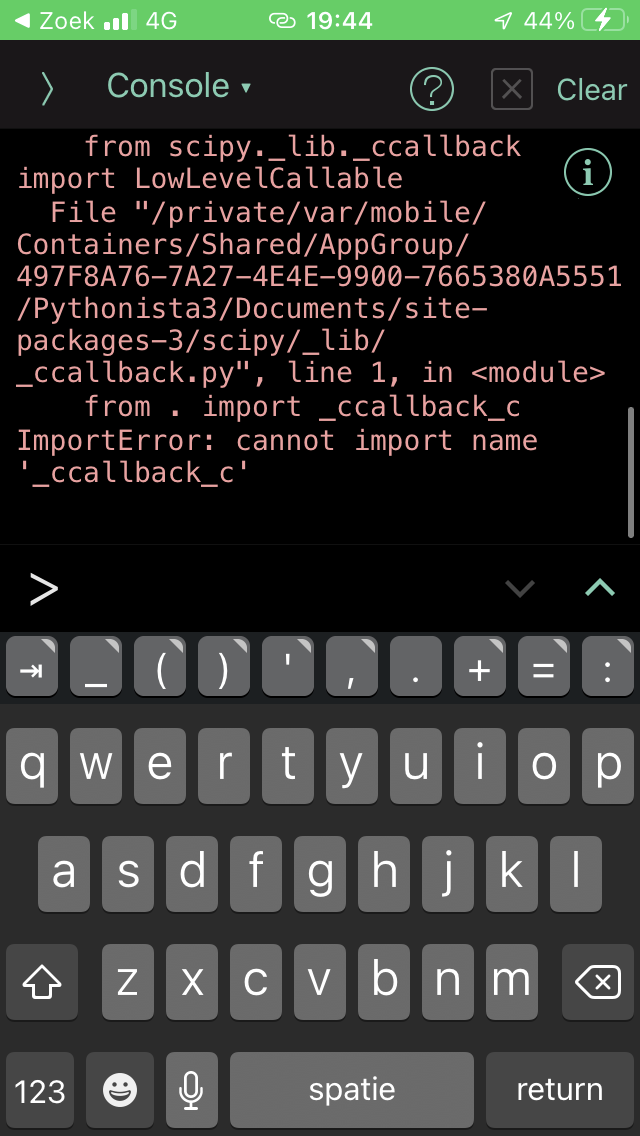
If we try to directly import this shared object using ctypes, we can see better why it will not work:

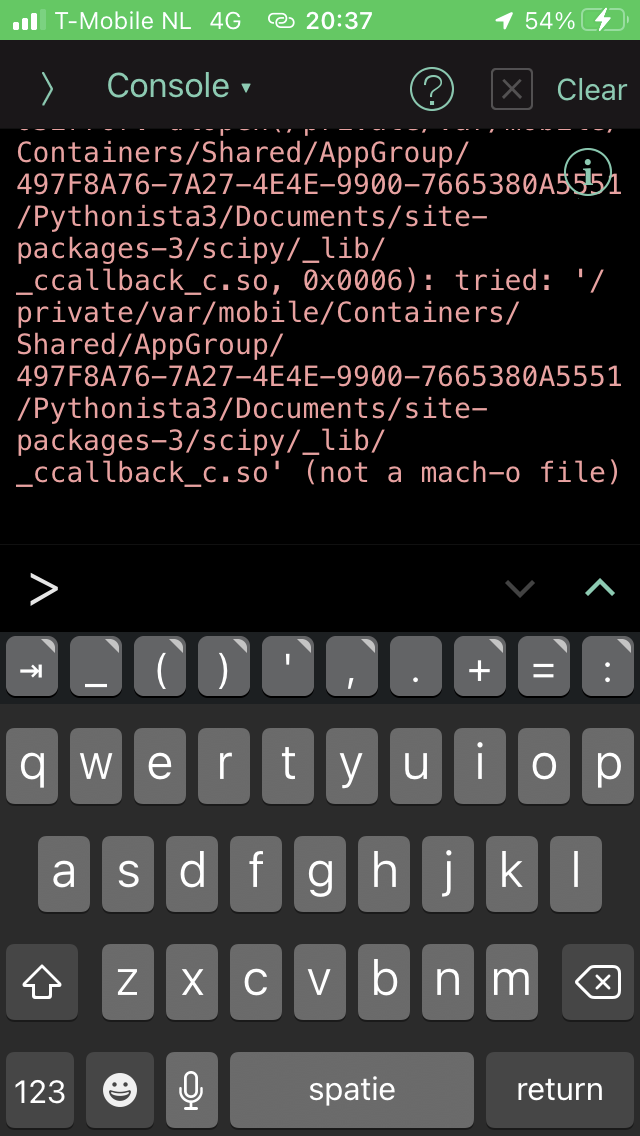
DLLs need to be Mach-O, instead of the a.out format.
But how does Pythonista include the non-standard-libraries it ships with?
To find out, I made a copy of the app itself.
This was quite easy to do, since Pythonista ships with Python:
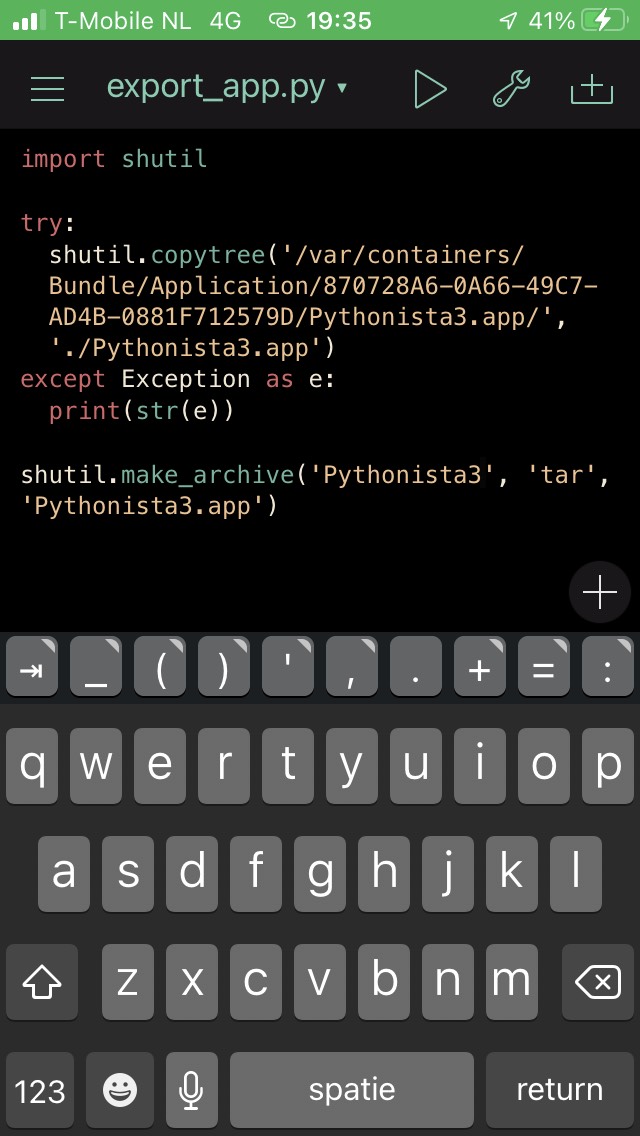
Using this dump, I could determine that the extra packages like numpy and matplotlib all live in Frameworks/Py3Kit.framework/pylib/site-packages.
However, in this directory, all shared objects that normally also live there, are missing.
If we decompile the app’s Py3Kit.framework executable, we can see that it actually contains these binary Python modules that were missing in site-packages.
They are all added to the built-in Python packages, using the _PyImport_AppendInittab method available in Python’s C API.
void PYK3Interpreter::registerBuiltinModules(ID param_1,SEL param_2)

{
  _PyImport_AppendInittab("speech",_PyInit_speech);
  _PyImport_AppendInittab("reminders",_PyInit_reminders);
  _PyImport_AppendInittab("contacts",_PyInit_contacts);
  _PyImport_AppendInittab("sound",_PyInit_sound);
  _PyImport_AppendInittab("linguistictagger",_PyInit_linguistictagger);
  _PyImport_AppendInittab("_ui",_PyInit__ui);
  _PyImport_AppendInittab("_notification",_PyInit__notification);
  _PyImport_AppendInittab("_pythonista",_PyInit__pythonista);
  _PyImport_AppendInittab("_keyboard",_PyInit__keyboard);
  _PyImport_AppendInittab("_dialogs",_PyInit__dialogs);
  _PyImport_AppendInittab("_appex",_PyInit__appex);
  _PyImport_AppendInittab("_font_cache",_PyInit__font_cache);
  _PyImport_AppendInittab("_scene2",_PyInit__scene2);
  _PyImport_AppendInittab("console",_PyInit_console);
  _PyImport_AppendInittab("_clipboard",_PyInit__clipboard);
  _PyImport_AppendInittab("_photos",_PyInit__photos);
  _PyImport_AppendInittab("_photos2",_PyInit__photos2);
  _PyImport_AppendInittab("_webbrowser",_PyInit__webbrowser);
  _PyImport_AppendInittab("_twitter",_PyInit__twitter);
  _PyImport_AppendInittab("location",_PyInit_location);
  _PyImport_AppendInittab("_motion",_PyInit__motion);
  _PyImport_AppendInittab("keychain",_PyInit_keychain);
  _PyImport_AppendInittab("_cb",_PyInit__cb);
  _PyImport_AppendInittab("_canvas",_PyInit__canvas);
  _PyImport_AppendInittab("_imaging",_PyInit__imaging);
  _PyImport_AppendInittab("_imagingft",_PyInit__imagingft);
  _PyImport_AppendInittab("_imagingmath",_PyInit__imagingmath);
  _PyImport_AppendInittab("_imagingmorph",_PyInit__imagingmorph);
  _PyImport_AppendInittab("_np_multiarray",_PyInit_multiarray);
  _PyImport_AppendInittab("_np_scalarmath",_PyInit_scalarmath);
  _PyImport_AppendInittab("_np_umath",_PyInit_umath);
  _PyImport_AppendInittab("_np_fftpack_lite",_PyInit_fftpack_lite);
  _PyImport_AppendInittab("_np__compiled_base",_PyInit__compiled_base);
  _PyImport_AppendInittab("_np__umath_linalg",_PyInit__umath_linalg);
  _PyImport_AppendInittab("_np_lapack_lite",_PyInit_lapack_lite);
  _PyImport_AppendInittab("_np_mtrand",&_PyInit_mtrand);
  _PyImport_AppendInittab("_np__capi",_PyInit__capi);
  _PyImport_AppendInittab("_mpl__backend_agg",_PyInit__backend_agg);
  _PyImport_AppendInittab("_mpl__image",_PyInit__image);
  _PyImport_AppendInittab("_mpl__path",_PyInit__path);
  _PyImport_AppendInittab("_mpl_ttconv",_PyInit_ttconv);
  _PyImport_AppendInittab("_mpl__cntr",_PyInit__cntr);
  _PyImport_AppendInittab("_mpl_ft2font",_PyInit_ft2font);
  _PyImport_AppendInittab("_mpl__png",_PyInit__png);
  _PyImport_AppendInittab("_mpl__delaunay",_PyInit__delaunay);
  _PyImport_AppendInittab("_mpl__qhull",_PyInit__qhull);
  _PyImport_AppendInittab("_mpl__tri",_PyInit__tri);
  _PyImport_AppendInittab("_counter",_PyInit__counter);
  _PyImport_AppendInittab("_AES",_PyInit__AES);
  _PyImport_AppendInittab("_ARC2",_PyInit__ARC2);
  _PyImport_AppendInittab("_ARC4",_PyInit__ARC4);
  _PyImport_AppendInittab("_Blowfish",_PyInit__Blowfish);
  _PyImport_AppendInittab("_CAST",_PyInit__CAST);
  _PyImport_AppendInittab("_DES3",_PyInit__DES3);
  _PyImport_AppendInittab("_DES",_PyInit__DES);
  _PyImport_AppendInittab("_MD2",_PyInit__MD2);
  _PyImport_AppendInittab("_MD4",_PyInit__MD4);
  _PyImport_AppendInittab("_RIPEMD160",_PyInit__RIPEMD160);
  _PyImport_AppendInittab("_SHA224",_PyInit__SHA224);
  _PyImport_AppendInittab("_SHA256",_PyInit__SHA256);
  _PyImport_AppendInittab("_SHA512",_PyInit__SHA512);
  _PyImport_AppendInittab("_XOR",_PyInit__XOR);
  _PyImport_AppendInittab("strxor",_PyInit_strxor);
  _PyImport_AppendInittab("pykit_io",_PyInit_pykit_io);
  return;
}
In a next post I’ll be looking into compiling the wheels with Mach-O shared libraries (or bundles as Apple calls them).
